Electrial Part Prep
Controller Modification
We will be disassembling the PS3 controller and modifying the pcb. This step might be the most difficult part of the project, just be careful and take your time.
Shell Disassembly
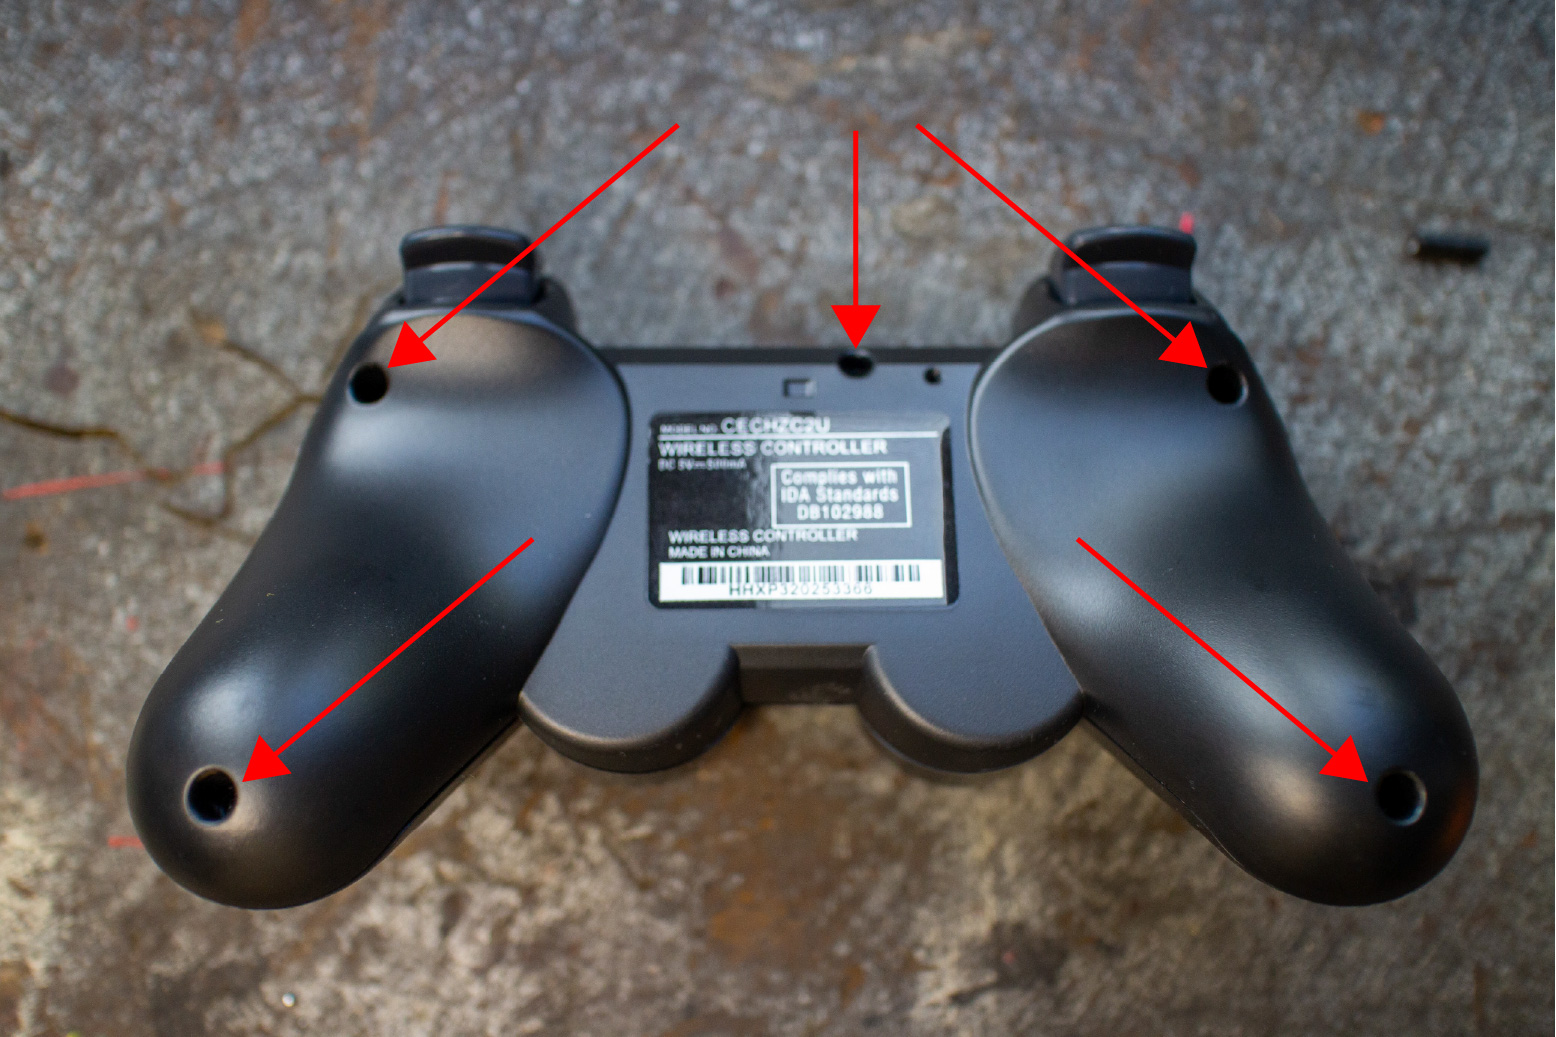
Unscrew the rear case of the controller.
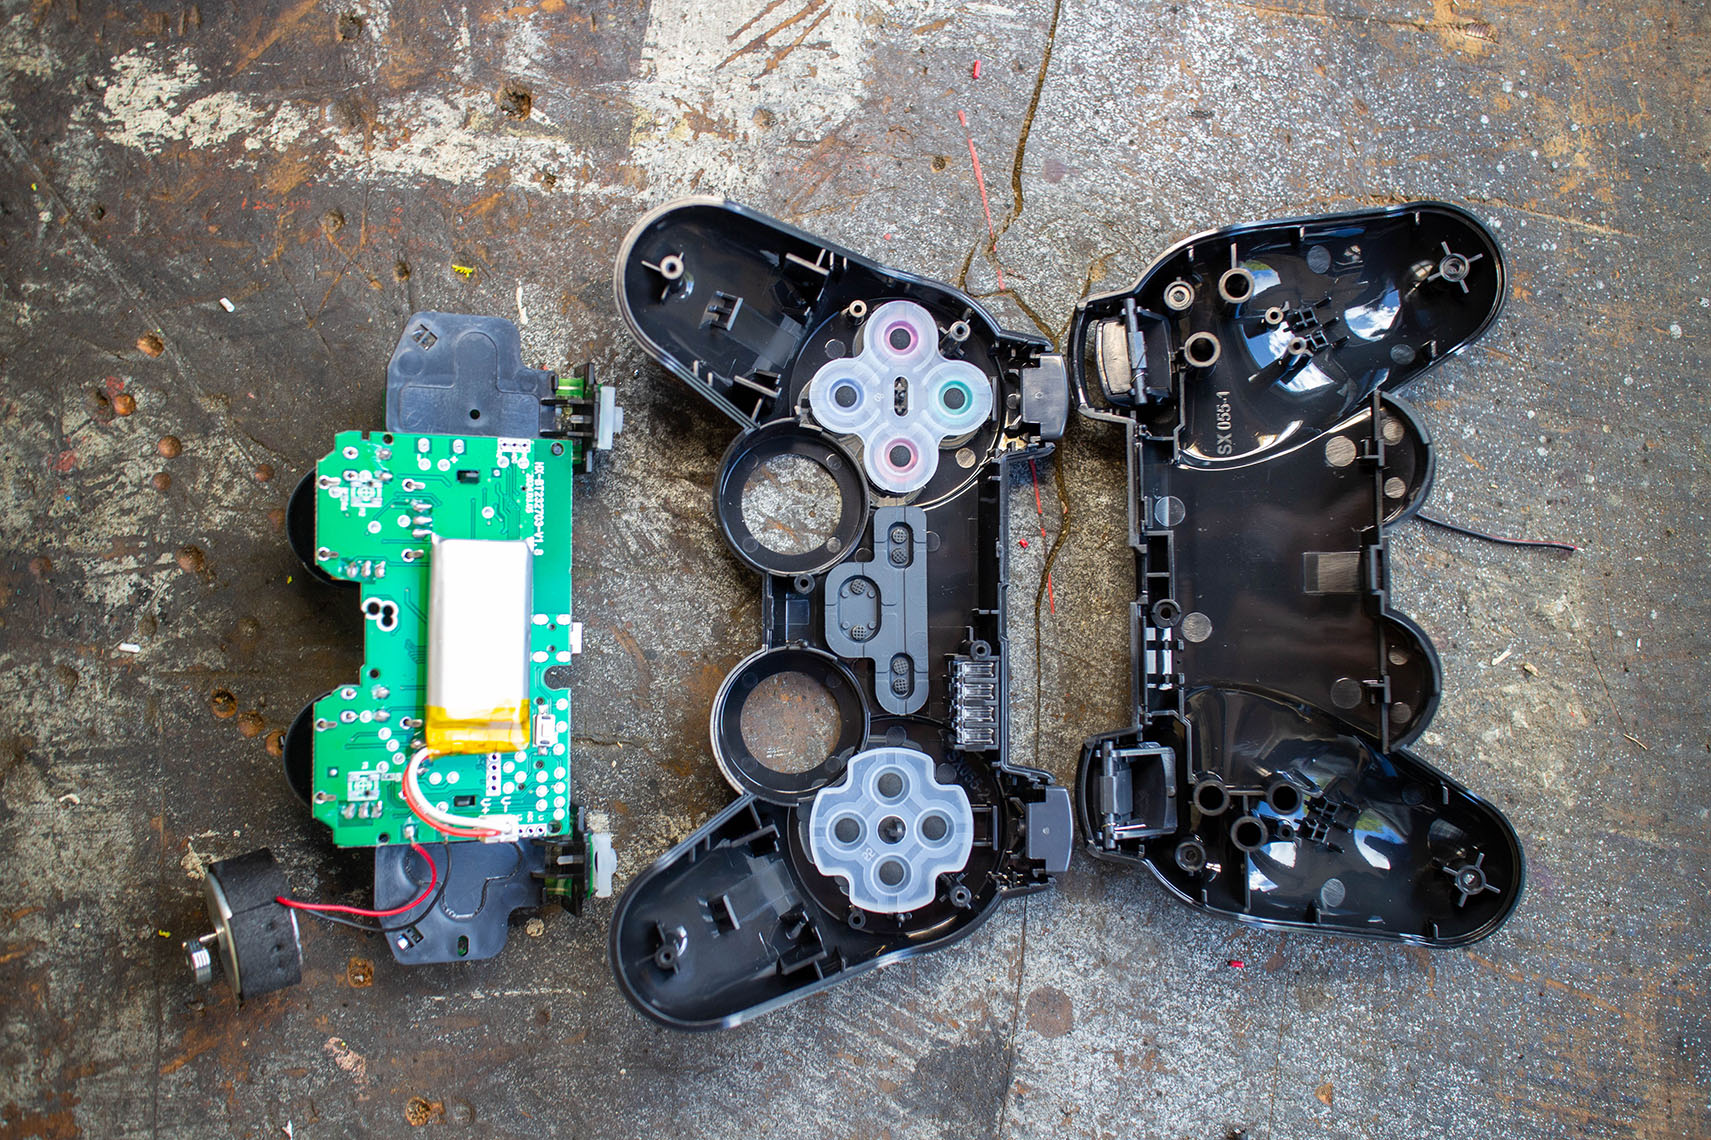
We need the following parts from the controller:
- Controller PCB
- Buttons:
- XO◻△
- Arrow keys
- Button Rubber Films
- Analogue Sticks
Further Disassembly
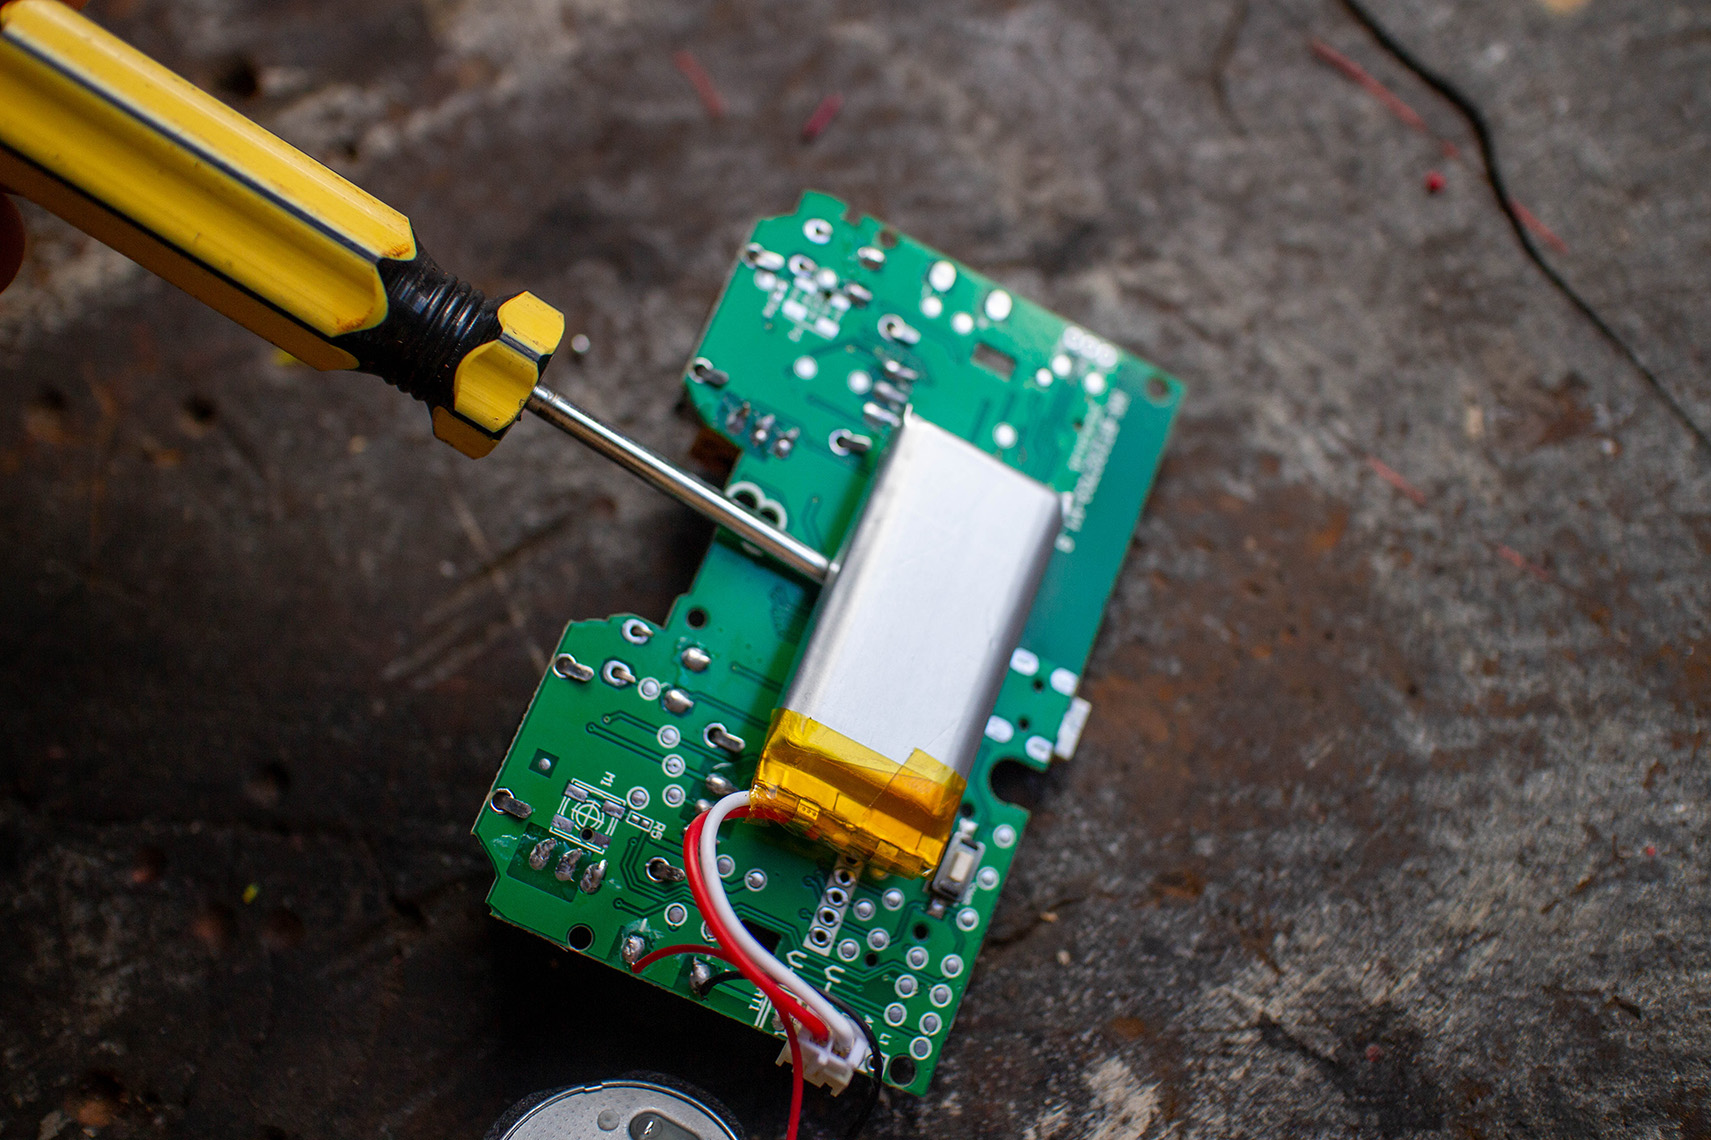
Remove the battery by gently prying underneath.
Snip off the battery terminals.
Remove the rumble motor by un-soldering the wires or cutting them flush.
Analogue Stick Removal

Pry up the tabs on the back of the analogue sticks.
This step can be quite difficult. Gently push a small screw driver under the analogue stick, don’t worry there is no circuitry under here to damage. Pry at it left and right whilst melting the solder points on the back. Just take your time here, moving from left to right until it’s starting to separate, then moving to the back. An alternative to the method shown would be to carefully heat the back of the analogue stick with a heatgun to melt the solder.
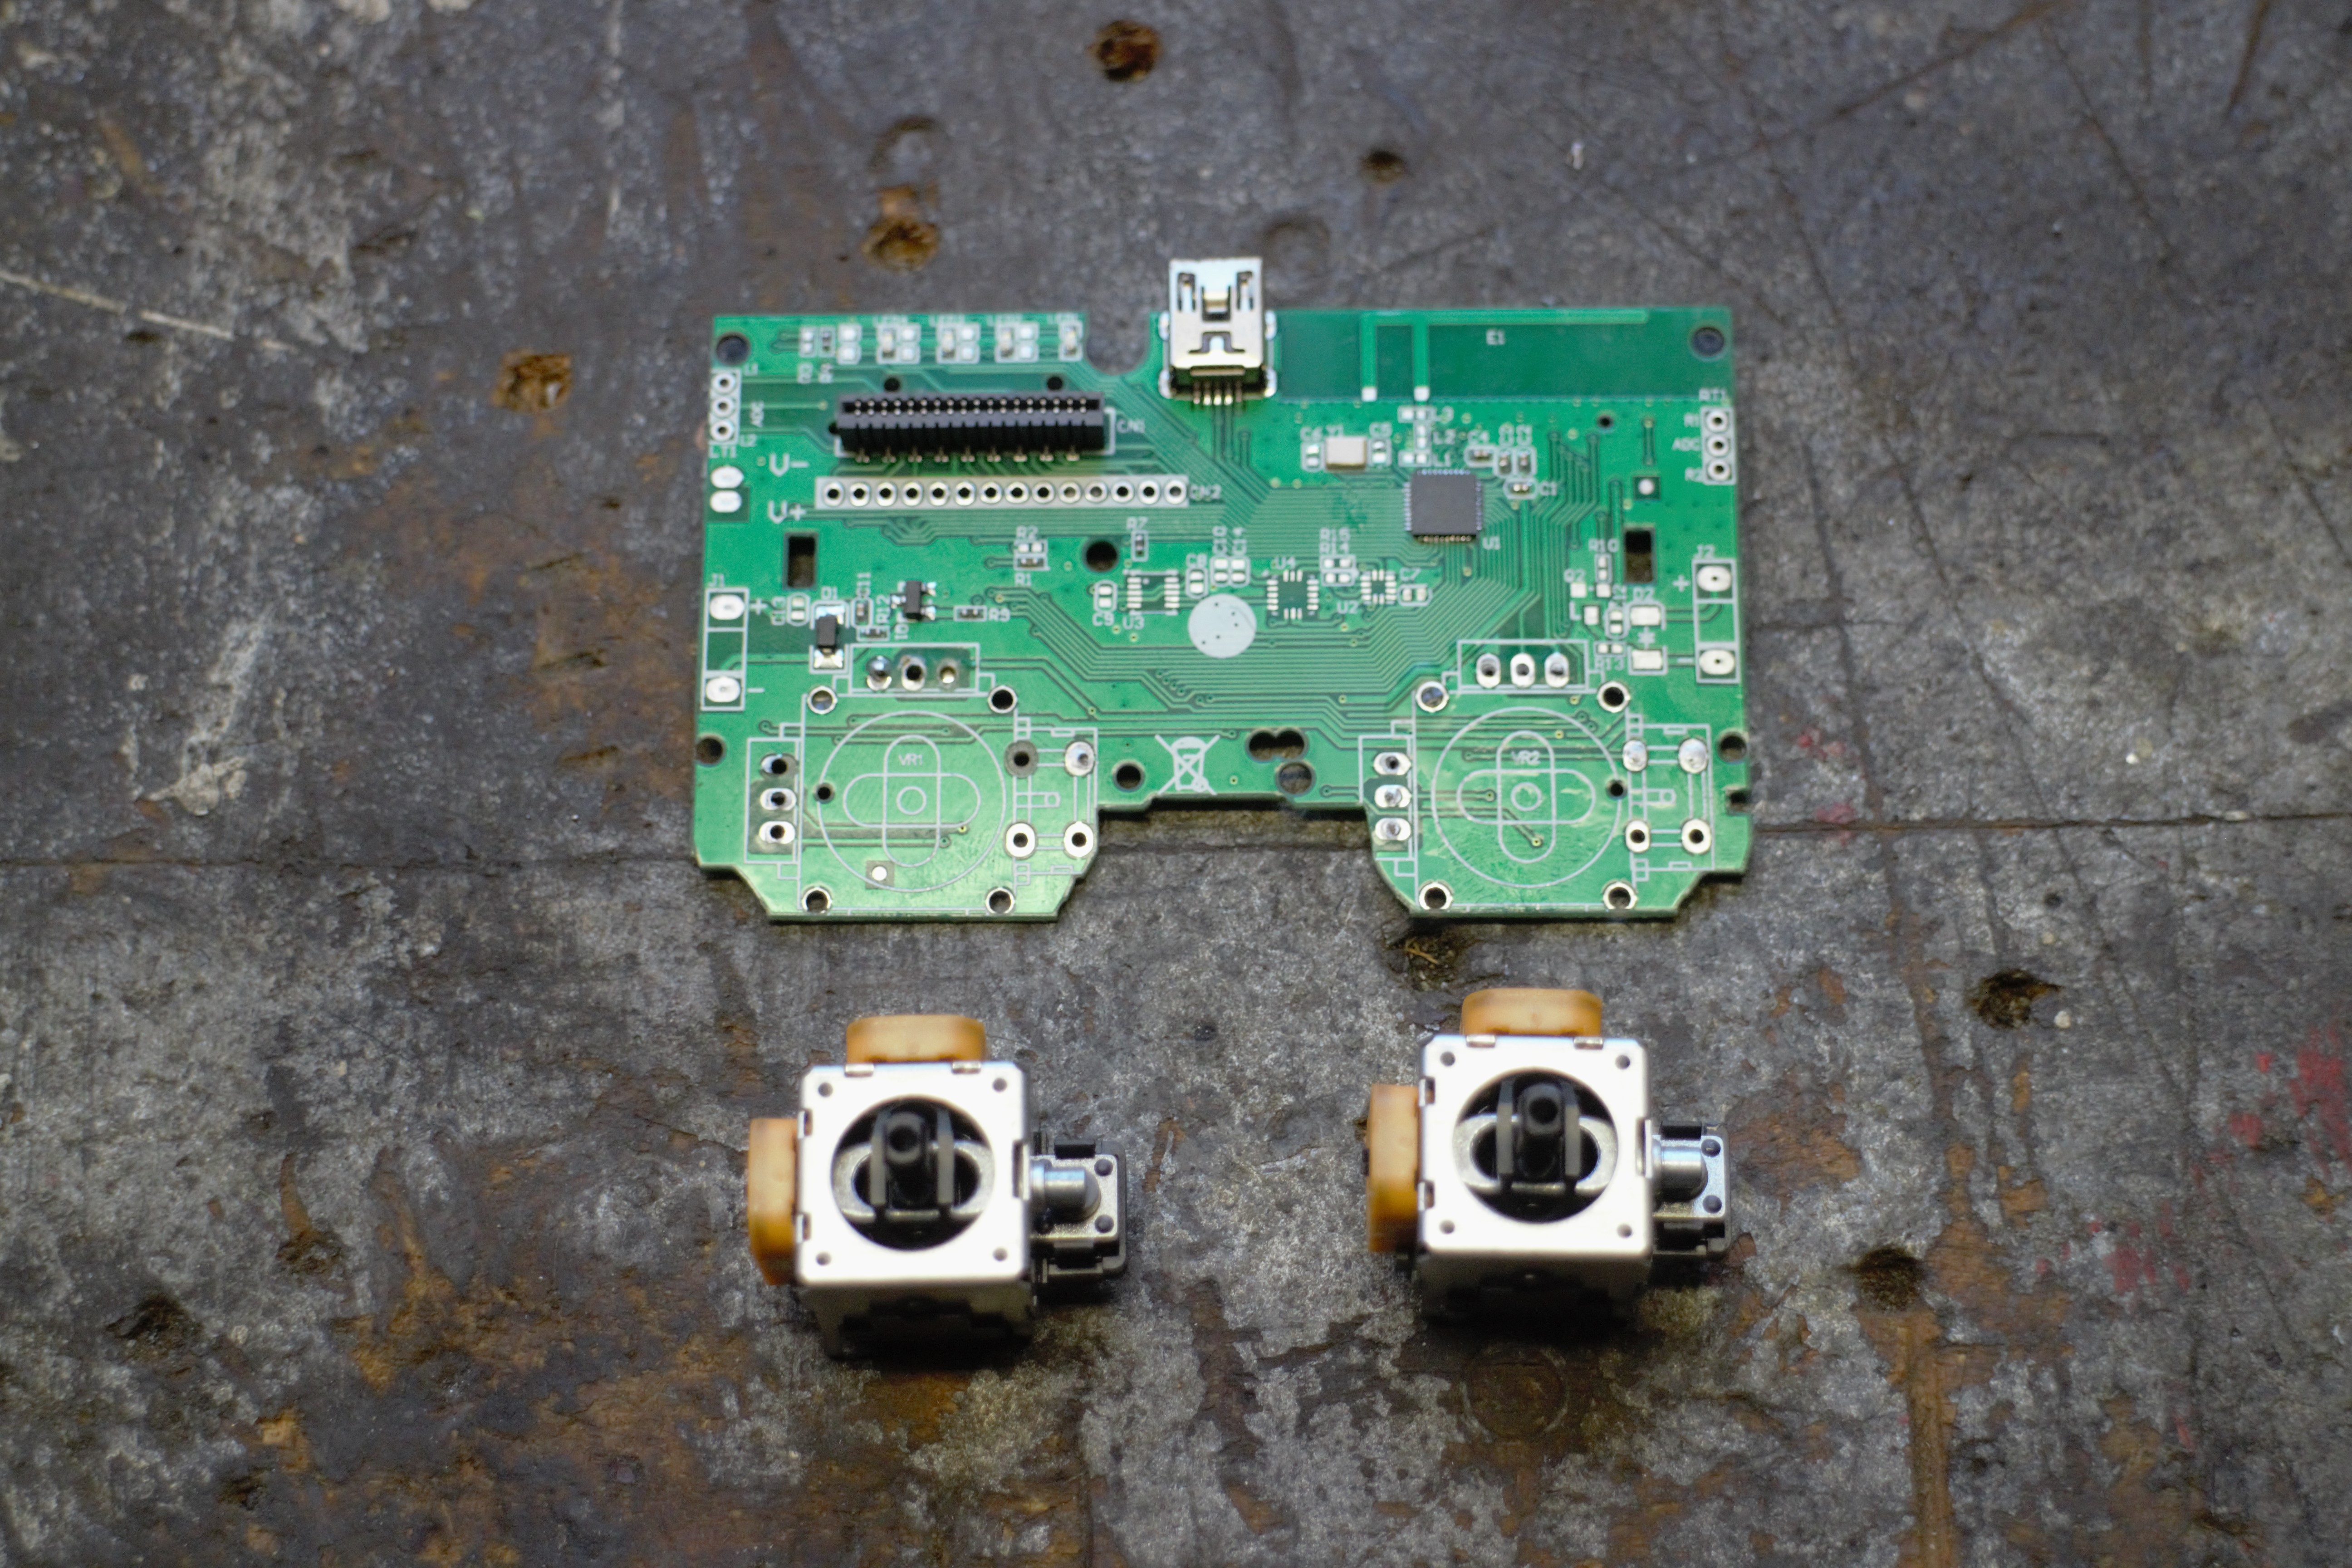
Here's your end result of your labour. Great job, it's all smooth sailing from here!